A note on measurements: this guide is written for US sewists, so it uses US units first: inches, yards
and US paper sizes (Letter, 36 × 48 in). Metric equivalents are in brackets where they matter. If you're not used to US
measurements, convert them before you cut: 1 in = 2.54 cm, 1 yd = 91.4 cm.
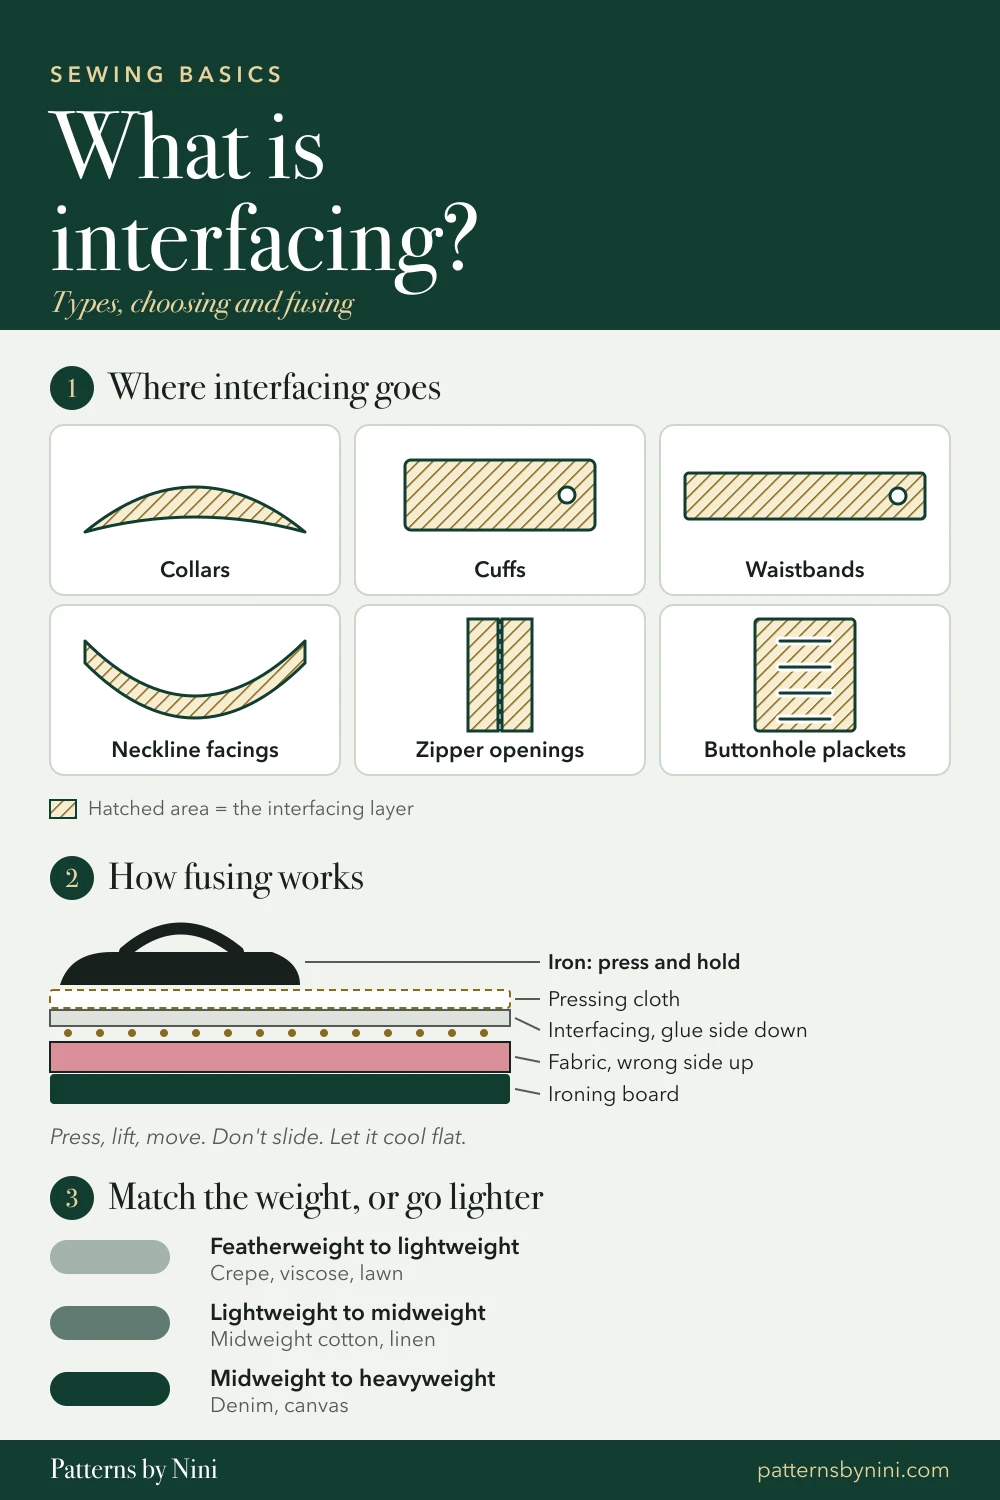
The short version as a picture. Tap to open it full size, or save it to Pinterest with the share bar above.
Interfacing is a layer of fabric attached to the wrong side of a garment piece to make that area firmer, more stable or less likely to stretch. You don’t see it from the outside, but it is what keeps a neckline facing flat, a collar standing, a waistband crisp and a zipper opening free of ripples. This guide explains what interfacing is in sewing, the main types, how to choose the right one for your fabric, and how to fuse it so it stays put through years of washing.
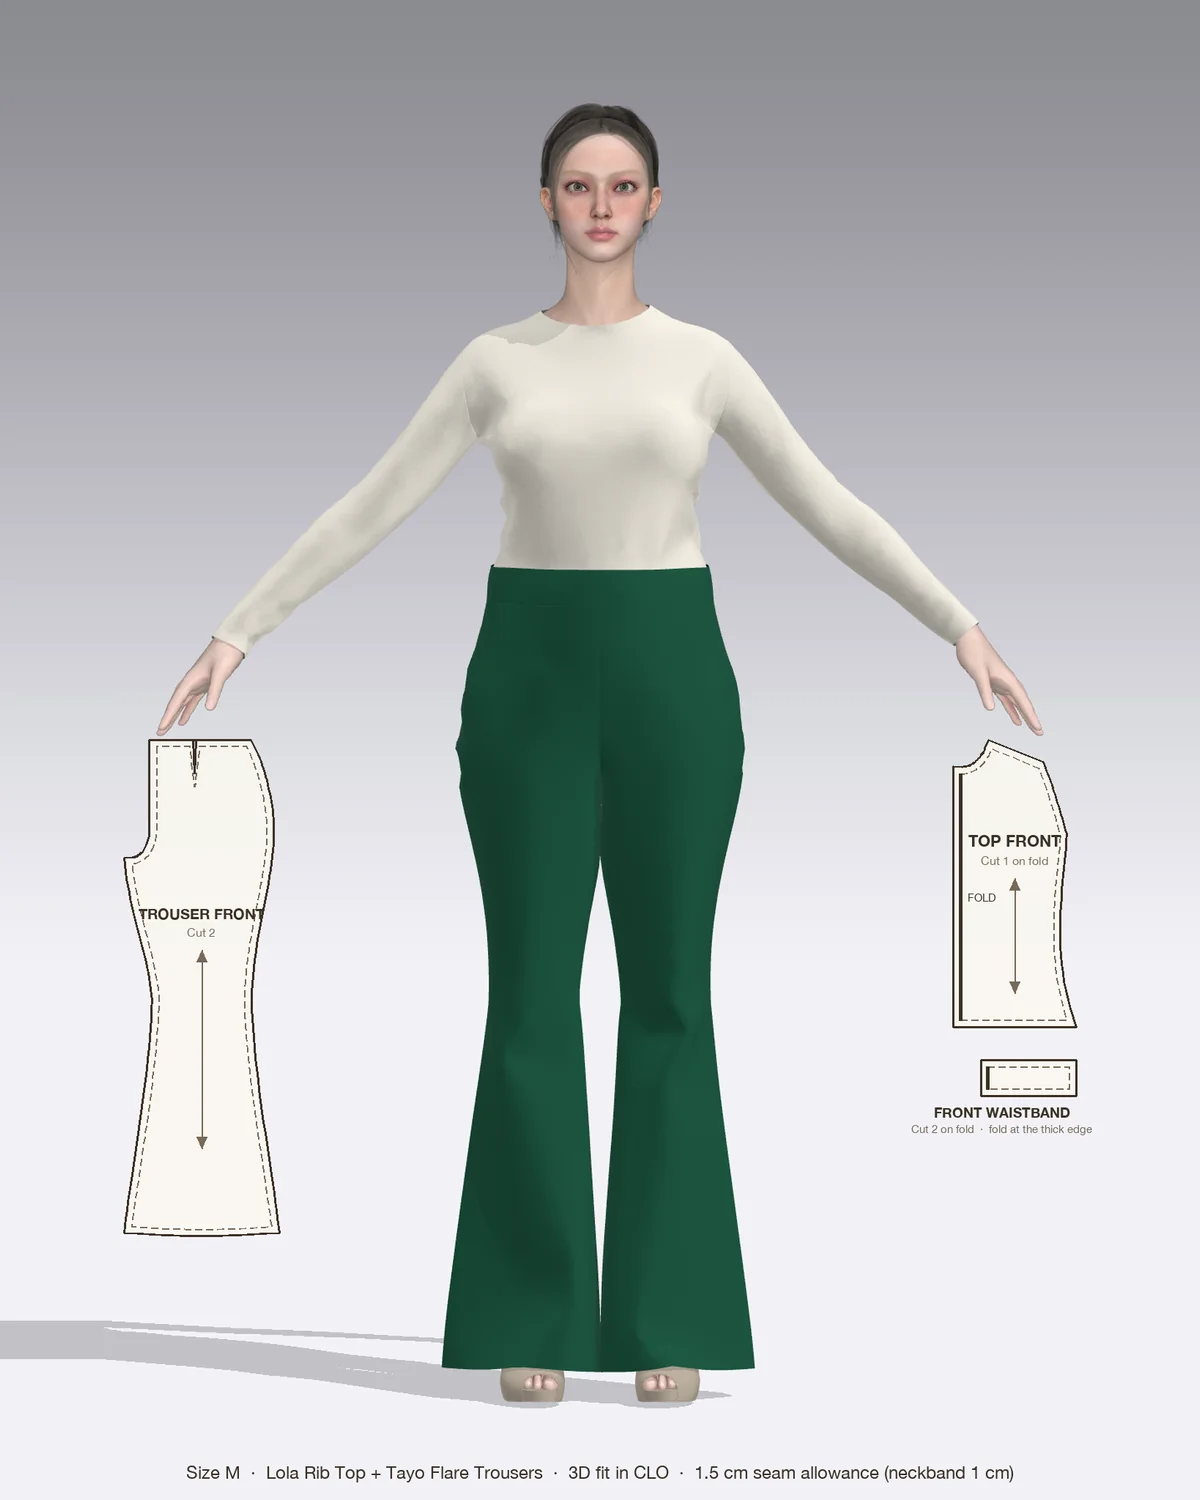
Draped in CLO 3D: the Tayo with its pattern pieces, drawn to scale.
What interfacing does
Most garment fabric is too soft on its own to hold an edge or carry stress. Interfacing adds support only where it’s needed. Common places you’ll find it:
Facings at the neckline and armholes, so they lie flat and don’t stretch out of shape
Collars, collar stands and cuffs, to give them body
Waistbands, so they don’t fold or roll when worn
Button and buttonhole plackets, so the stitching and buttons have something firm to anchor into
Zipper openings, where narrow strips stop the seam allowance stretching as you sew
Pocket openings and hems in some designs, to keep a crisp line
A pattern’s notions list tells you if you need it, and the pattern pieces or cutting layout show which pieces to interface.
The main types of interfacing
Interfacing is sorted in three ways: how it attaches, how it’s made, and how heavy it is.
Fusible or sew-in
Fusible interfacing has heat-activated glue on one side. You press it onto the fabric with an iron and it bonds as it cools. It’s quick, accurate and the most common choice for home sewing.
Sew-in interfacing has no glue. You baste it to the fabric inside the seam allowance and it’s held in place by the seams. Use it for fabrics that can’t take the heat or pressure of fusing (velvet, sequins, some silks and synthetics, heavily textured weaves), and when you want the softest possible drape, since fusing tends to stiffen fabric a little.
Woven, nonwoven or knit
Woven interfacing is made like cloth, with a lengthwise and crosswise grain. Cut it on the same grain as your fabric piece. It moves most like fabric and suits shirts, dresses and fine wovens.
Nonwoven interfacing is bonded fibers, a little like felt or paper. It has no grain, so you can cut it in any direction. It’s economical and firm, which makes it popular for bags and crafts, but it can feel stiff in clothing.
Knit (tricot) interfacing stretches in at least one direction. Use it on jersey and other knits so the interfaced area can still stretch, and on wovens where you want a softer hand.
Weight
Interfacing comes in roughly featherweight, lightweight, midweight and heavyweight. The general rule is to match your fabric’s weight or go slightly lighter. Interfacing heavier than the fabric makes the area stiff, and the edge of the interfaced piece can show as a ridge on the right side.
How to choose interfacing for your fabric
Start with the pattern. If it names a type and weight, use that.
Match the stretch. Knit fabric gets knit interfacing. Woven fabric can take woven, nonwoven or knit.
Match the weight, or go lighter. Lightweight crepe, viscose and lawn want a featherweight or lightweight fusible. Midweight cotton and linen take a lightweight to midweight. Denim and canvas take midweight to heavyweight.
Check heat tolerance. If your fabric marks, melts or loses its texture under a hot iron, choose sew-in.
Pick the color. White or cream for light fabrics, black or charcoal for dark ones, so it doesn’t shadow through.
Test on a scrap. Fuse a 4 in (10 cm) square of interfacing to a scrap of your fabric, let it cool and check the hand. If it’s too stiff, try a lighter weight. If it shows through or bubbles, try another type or switch to sew-in.
How to apply fusible interfacing, step by step
Fusing correctly is mostly about heat, pressure and time. Always check the instructions printed on the interfacing’s selvage or packaging, because products differ.
Prepare
Pre-shrink if the label says to. Woven and weft-insertion fusibles are the types most likely to need it. Soak the folded piece in hot tap water for 10 to 20 minutes, gently squeeze out the water and hang it to drip dry. Don’t put it in the washer or dryer by itself.
Cut the interfacing from the same pattern piece as the fabric, on the grain for woven types. To reduce bulk in heavier interfacings, trim about 1/2 in (1.3 cm) from the seam allowances so it stops just inside the seam line.
Find the glue side. It’s the slightly rough, dotted side.
Fuse
Lay the fabric wrong side up on the ironing board and place the interfacing glue side down on top, edges aligned.
Cover it with a pressing cloth. A damp cotton cloth adds steam and protects both the fabric and your iron from stray glue.
Set the iron to the temperature the interfacing label gives, or the highest your fabric can safely take, typically a cotton or linen setting for those fibers and a lower wool or synthetic setting for viscose and polyester.
Press, don’t iron. Lower the iron, hold it still with firm pressure for about 10 to 15 seconds (until a damp cloth is dry), lift it and move to the next section, overlapping slightly. Sliding the iron can shift or wrinkle the interfacing.
Turn the piece over and press from the right side to finish the bond.
Let it cool flat before you move it. The glue sets as it cools; handling a warm piece can lift the edges.
Check the bond by trying to peel back a corner. If it lifts, press that area again.
Block fusing for small pieces
For lots of small pieces, such as facings, Threads Magazine suggests block fusing: lay a large sheet of interfacing on the board glue side up, arrange the cut fabric pieces wrong side down on top, cover with plain paper or a nonstick pressing sheet and fuse everything at once. Then cut the pieces free. It saves time and keeps the interfacing exactly the shape of each piece.
Interfacing in the Tayo flare pants
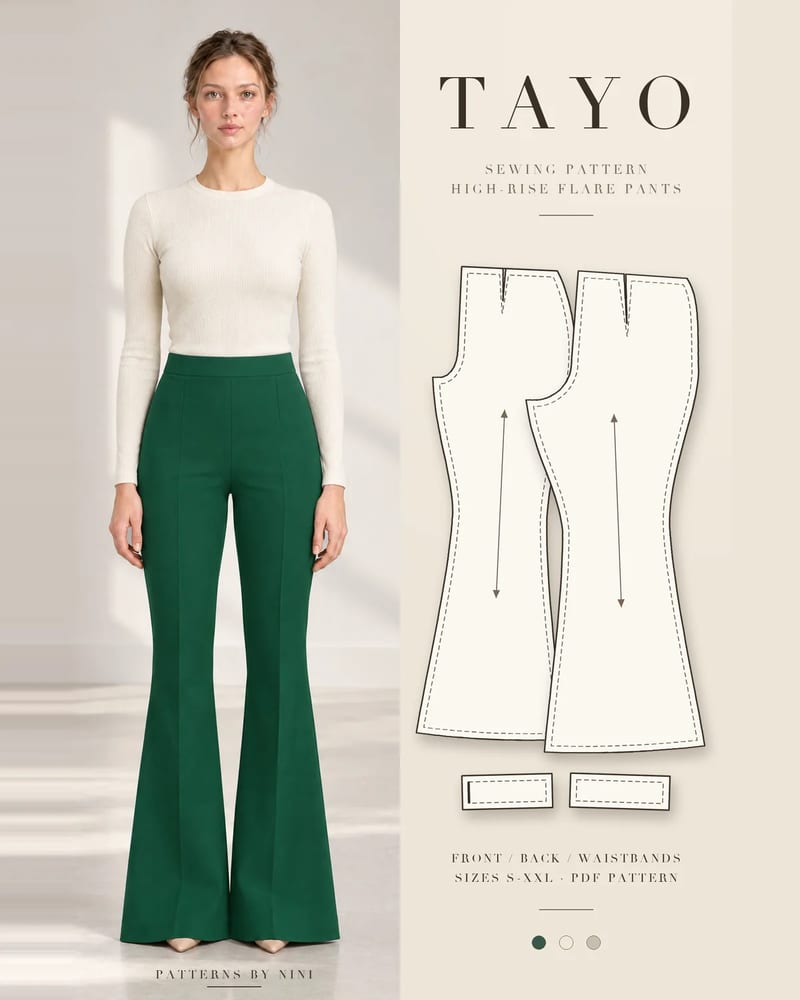
The Tayo high-rise fitted flare pants have a high-rise flat waistband that is interfaced, and the notions list calls for lightweight fusible interfacing. Tayo’s recommended fabrics are stretch suiting, crepe or ponte-weight wovens with 2 to 5% elastane, so choose a lightweight fusible with some give, test it on a scrap first, and use a pressing cloth with a moderate heat setting.
Tayo also closes with an invisible zipper in the left side seam. In a light or slippery fabric, fusing narrow strips of the same interfacing to the seam allowances along the opening stops it stretching while you sew; the guide to sewing an invisible zipper shows where to place them. The Nina shift dress uses lightweight fusible interfacing in the same way, on its all-in-one neck and armhole facings.
Common interfacing mistakes and how to fix them
Problem
Likely cause
Fix
Bubbles or wrinkles right after fusing
Not enough heat, pressure or time
Press again with a damp cloth, holding each spot 10 to 15 seconds
Bubbles after washing
Interfacing shrank more than the fabric
Pre-shrink next time, or choose a nonwoven that doesn’t need it
Area feels stiff or board-like
Interfacing too heavy for the fabric
Use a lighter weight, or a knit or sew-in type
Ridge showing on the right side
Interfacing edge too heavy, or pressed too hard
Trim interfacing out of the seam allowance; go lighter
Glue on the iron
Interfacing fused glue side up, or no pressing cloth
Clean the iron when cool; always use a cloth
Shiny or flattened fabric
Iron too hot for the fiber
Lower the heat and press through a cloth, or use sew-in
Interfaced knit no longer stretches
Woven or nonwoven interfacing used
Use knit interfacing on stretch fabrics
Quick checklist
Type matched to the fabric: knit for knits, sew-in for heat-sensitive fabrics
Weight the same as the fabric or lighter, tested on a scrap
Pre-shrunk if the label says to
Glue side down on the wrong side of the fabric
Pressed (not ironed) through a pressing cloth for about 10 to 15 seconds per section
Left to cool flat, then checked at the corners
Once you’re comfortable with interfacing, the other details that give a garment a clean inside are worth learning too, such as French seams for fine fabrics and well-pressed darts.
Frequently asked questions
What is the difference between interfacing and interlining?
Interfacing goes into small, specific areas such as facings, collars, cuffs, waistbands and buttonhole plackets to give them shape and stop them stretching. Interlining is a full extra layer cut from the main pattern pieces, usually for warmth or opacity in coats and jackets. Interfacing is about structure in one area; interlining changes the whole garment.
Can I skip interfacing if the pattern calls for it?
You can, but the area it was meant to support will usually suffer. Facings roll to the outside and stretch, collars collapse, buttonholes pucker and zipper openings ripple. If you don't have the interfacing the pattern lists, a layer of lightweight cotton such as batiste or organza, basted in as a sew-in interfacing, is a better substitute than nothing.
Should I pre-shrink fusible interfacing?
Check the label. Many nonwoven fusibles don't need it, but woven and weft-insertion types often shrink. To pre-shrink, soak the folded piece in hot tap water for 10 to 20 minutes, squeeze gently and hang it flat to drip dry. Never put it in the washer or dryer on its own, because that can loosen the adhesive.
Which side of fusible interfacing is the glue side?
The adhesive side is slightly rough or bumpy and often a little shiny, because the glue is applied as small dots. The other side feels smoother. Always place the glue side against the wrong side of your fabric. If you fuse it the wrong way round, the glue melts onto your iron or pressing cloth instead of the fabric.
Why is my fusible interfacing bubbling?
Bubbles straight after fusing mean the glue didn't fully melt: press again with more heat, a little steam or a damp cloth, and hold each spot longer. Bubbles that appear after washing usually mean the interfacing shrank more than the fabric, so pre-shrink next time. A fabric that can't take enough heat may need sew-in interfacing instead.
How to sew bell bottom pants step by step: pick a flare pattern or add flare to one you own, then fit the knee, sew the legs and hem the wide flare neatly.
Fabric grain in sewing explained: find the lengthwise, crosswise and bias grain, check if fabric is off grain, straighten it and lay pattern grainlines right.
Help us understand what inspires you
May we use Pinterest cookies to measure visits and purchases and improve our advertising? You can shop either way and change your choice in Cookie settings. Privacy policy
 Patterns