A note on measurements: this guide is written for US sewists, so it uses US units first: inches, yards
and US paper sizes (Letter, 36 × 48 in). Metric equivalents are in brackets where they matter. If you're not used to US
measurements, convert them before you cut: 1 in = 2.54 cm, 1 yd = 91.4 cm.
To hem a dress, try it on with the shoes you will wear, have someone mark the length an even distance from the floor, and trim the excess below a hem allowance. Then press the hem up and stitch it by machine or by hand. The right hem depth depends on the skirt’s shape: deep for straight skirts, narrow for flared and bias-cut ones.
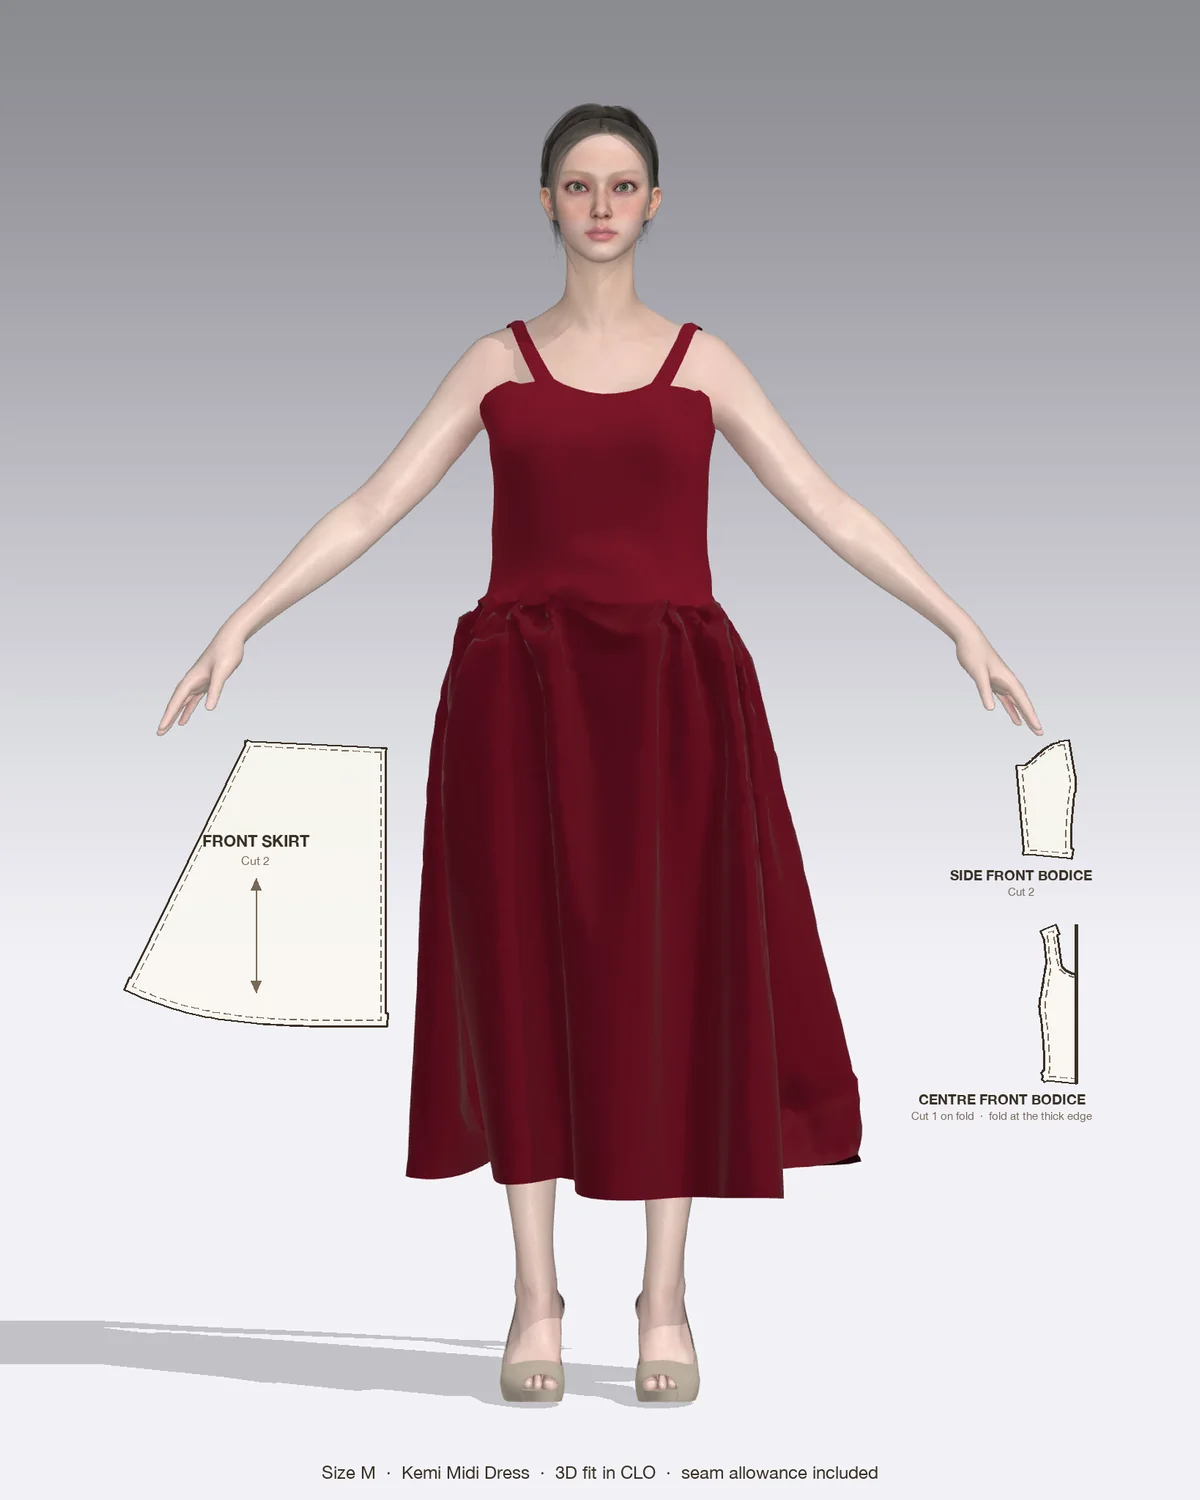
Draped in CLO 3D: the Kemi with its pattern pieces, drawn to scale.
This guide on how to hem a dress covers dresses you are sewing from a pattern and ready-to-wear dresses that are too long. For a finished dress, unpick the old hem, press out the crease and treat the old fold line as a guide only.
What you need
Yardstick or hem marker, plus pins or chalk. A helper makes marking much easier.
Tape measure and seam gauge to keep the hem depth even.
Sharp shears or a rotary cutter.
Iron and pressing cloth. A tailor’s ham or rolled towel helps on curves.
Thread matched to the dress, and a fine hand sewing needle.
Machine needle suited to the fabric: a microtex 70/10 for lawn, viscose and silky fabrics, a universal 80/12 for poplin and linen.
Seam ripper if you are shortening a finished dress.
Step 1: Hang the dress and mark the length
Finish the rest of the dress first. Sew the bodice, zipper and waist seam before marking the hem, because they change where the skirt falls.
Let it hang. If the skirt is cut on the bias, a full circle or in a drapey fabric, hang the dress on a padded hanger or dress form for at least 24 hours. Bias areas stretch unevenly and the hem drops in places.
Dress for the fitting. Wear the shoes and undergarments you will wear with the dress, and stand straight with your weight on both feet.
Mark from the floor. Your helper measures up from the floor with a yardstick and places a pin or chalk mark every 2 to 3 in (5 to 7.5 cm) all the way around. Measuring from the floor, not from the waist, is what makes the hem level on your body.
Check it. Fold the hem up along the marks and look in a mirror from the front, side and back. Adjust any marks that look high or low.
Step 2: Choose the hem depth
The more the hem edge curves, the narrower the hem must be. A curved edge folded up is longer than the skirt it is sewn to, so a deep hem on a flared skirt ripples and puckers.
Skirt shape
Hem type
Hem depth
Straight, pencil or shift
Single fold, raw edge finished
2–3 in (5–7.5 cm)
Gathered skirt with a straight hem edge
Double fold
1–1 1/2 in (2.5–4 cm) turned twice
A-line or gently flared
Single or double fold
1–1 1/4 in (2.5–3 cm)
Circle and bias-cut skirts
Narrow double fold
1/4 in (6 mm) turned twice
Chiffon, georgette and sheers
Narrow rolled hem
1/8–1/4 in (3–6 mm)
Knits
Single fold
1 in (2.5 cm)
Mark a cutting line that far below the fold line (twice the depth for a double-fold hem), check it is even all the way round, and cut.
Step 3: Prepare and press the hem
Trim seam allowances inside the hem. Where side seams cross the hem allowance, press them open and trim them to about half width in that section, so there is no lump at each seam.
Finish the raw edge of a single-fold hem with a serger or a zigzag about 3 mm wide and 2 mm long.
Ease in fullness on A-line skirts. Machine baste with a slightly longer stitch, about 4 mm, 1/4 in (6 mm) from the raw edge. Fold the hem up and pull the bobbin thread gently until the allowance lies flat against the skirt, then steam the ripples away.
For a narrow hem, stitch a guide line 1/4 in (6 mm) from the raw edge, press the edge up along the stitching, then fold again by 1/4 in (6 mm) so the stitching sits inside the fold.
Press with the right heat: high (around 400°F / 200°C) with steam for cotton and linen, medium (around 300°F / 150°C) with a pressing cloth for silk and wool, and low to medium for polyester, viscose and rayon. Press up and down; don’t slide the iron along a curved hem, or it will stretch.
Step 4: Stitch the hem
By machine
Topstitched hem. Sew from the wrong side, 1/8 in (3 mm) from the top fold, at a stitch length of 2.5 to 3 mm. Start at a side seam so the backstitches hide there. This is the usual finish for casual cotton and linen dresses and for narrow hems.
Blind hem. For dressier fabrics, use the machine’s blind hem stitch and foot. Fold the hem back under the skirt so about 1/4 in (6 mm) of the finished edge shows, guide the foot along the fold and set the width so the bite only just catches it. Test on an offcut first.
Knits. Use a twin needle, a narrow zigzag or a stretch stitch so the hem can stretch.
By hand
A hand-sewn hem is almost invisible and lets the skirt move freely, which suits midi and maxi dresses in drapey fabrics.
Pin or baste the pressed hem about 3/8 in (1 cm) below its top edge.
Thread a fine needle with a single strand of thread no longer than your arm and knot the end.
Start at a side seam and hide the knot inside the hem allowance.
Work a blind hem stitch or slip stitch, picking up one or two threads of the skirt and moving 1/4 to 3/8 in (6 to 10 mm) along each time.
Every 4 to 6 in (10 to 15 cm), take a small backstitch in the hem allowance so a broken thread can’t undo the whole hem.
The hand sewing stitches guide shows the blind hem stitch and the stretchier catch stitch, which is the better choice on bias-cut skirts.
Slits, linings and other special cases
Slits. Hem the slit edges and the skirt hem separately, and miter the corner where they meet so it lies flat. Press the hem and slit allowances up, open them out, fold the corner diagonally through the point where the fold lines cross, trim to 1/4 in (6 mm) and slip stitch the miter closed.
Lined skirts. Hem the dress first. Then let the lining hang, cut it level with the finished hem and give it its own narrow double-fold hem, so the lining finishes about 1/2 in (1.3 cm) shorter and never peeks out. Thread chains at the side seams hold the layers together loosely.
Tiered skirts. Shorten from the bottom tier only, so the tier seams stay where the design puts them.
Strongly curved hems. If a narrow hem still ripples, face it with bias binding cut 1 in (2.5 cm) wide: the bias bends to follow the curve.
Hems in Patterns by Nini dresses
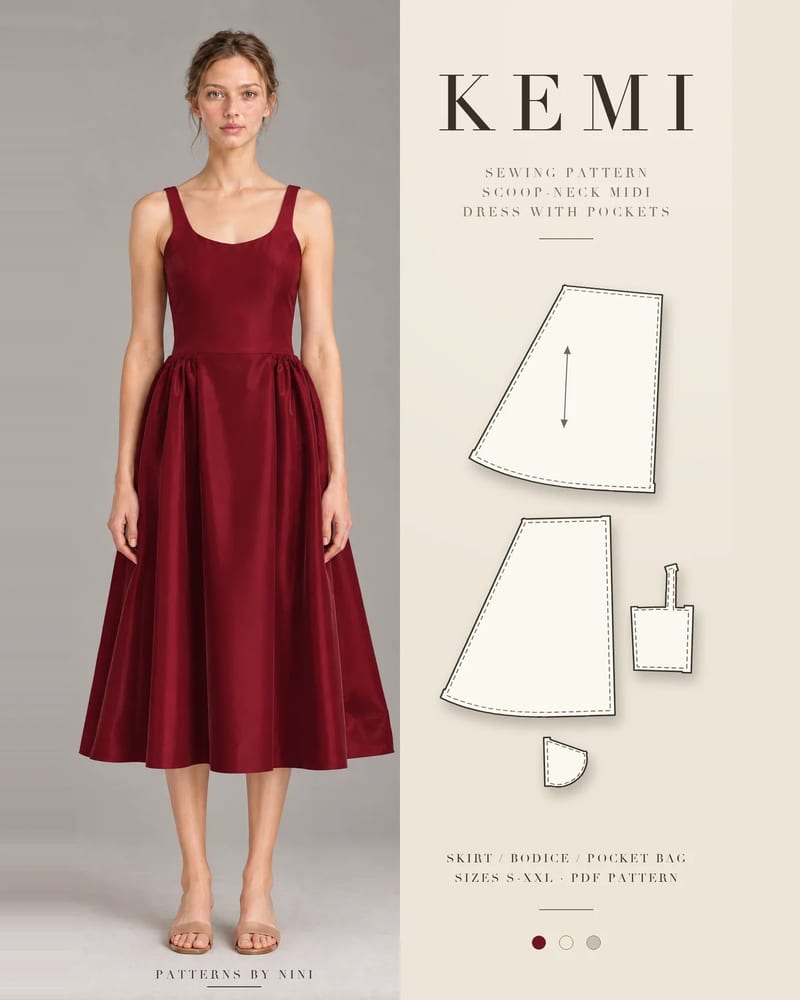
The Kemi midi dress has a tea-length skirt that is flat at center front and back and gathered at the sides, in wovens such as cotton poplin, lawn, linen, viscose or lightweight taffeta. Sew the lined bodice, in-seam pockets and center-back invisible zipper first, then hang the dress and mark the hem from the floor in the shoes you will wear. Check the hem edge on your pattern piece: the straighter it is, the deeper the hem you can use. Viscose drops more than poplin, so give a viscose Kemi the full 24 hours on the hanger.
The Nneka maxi dress is Kemi’s floor-length version with a slit in the left side seam, so it uses the mitered slit corner above. The bias-cut skirts on the Sade midi dress and Ife maxi dress flare toward the hem and need the full hanging time and a narrow hem. On tiered styles such as the Temi tiered dress, the hem is only on the bottom tier.
Narrow the hem, ease the fullness, or use a bias facing
Lumps at the side seams
Seam allowances not trimmed in the hem
Press open and trim to half width inside the hem
Stitches show on the right side
Too much fabric caught per stitch
Pick up only one or two threads; narrow the machine bite
Hem stretched out of shape
Iron slid along a curved edge
Steam and press straight down; let it cool before moving
Shiny ridge along the hem
Pressed on the outside without a cloth
Press from the inside with a pressing cloth
When the hem is done, give it a final press from the inside and try the dress on once more in the same shoes to check it hangs level all the way round.
Frequently asked questions
How much hem allowance does a dress need?
It depends on how much the hem edge curves. Straight and slim skirts can take a deep hem of 2 to 3 in (5 to 7.5 cm), which adds weight and helps them hang. A-line and gently flared skirts suit 1 to 1 1/4 in (2.5 to 3 cm). Circle and bias-cut skirts need a narrow hem of 1/2 in (1.3 cm) or less.
How do you hem a dress by hand?
Mark and press the hem, then use a blind hem stitch or a slip stitch with a single strand of thread in a fine needle. Pick up only one or two threads of the skirt with each stitch, spacing them about 1/4 to 3/8 in (6 to 10 mm) apart, and keep the thread relaxed. Use a catch stitch on knits and bias-cut skirts so the hem can stretch.
How long should a bias-cut dress hang before hemming?
Hang it for at least 24 hours on a padded hanger or dress form before you mark the hem, and longer for heavy or very drapey fabrics such as crepe and viscose. Bias-cut and circle skirts stretch under their own weight, unevenly around the hem. Marking after the drop means the hem stays level once the dress is worn.
Can you hem a dress without sewing?
Yes, for a quick or temporary fix. Fusible hem tape or fusible web is pressed between the hem allowance and the skirt with a hot iron and holds a folded hem in place. It works best on straight hems in stable fabrics. It is not a good choice for very curved hems or sheer fabrics, and it may loosen after many washes.
How to choose a sewing pattern size: measure your bust, waist and hip, read the body chart, check finished measurements for ease and pick a starting size.
How to finish seams without a serger: zigzag, overcast, pinked, turned and stitched, French, flat-felled, bound and hand overcast, with settings for each.
Help us understand what inspires you
May we use Pinterest cookies to measure visits and purchases and improve our advertising? You can shop either way and change your choice in Cookie settings. Privacy policy
 Patterns