A note on measurements: this guide is written for US sewists, so it uses US units first: inches, yards
and US paper sizes (Letter, 36 × 48 in). Metric equivalents are in brackets where they matter. If you're not used to US
measurements, convert them before you cut: 1 in = 2.54 cm, 1 yd = 91.4 cm.
A muslin is a quick test version of a garment, sewn in inexpensive fabric so you can check the fit before you cut your real fabric. To make one, you cut the main pattern pieces from cheap woven fabric, mark the seamlines and balance lines, baste it together with a long stitch, try it on, pin out the problems and copy every change back to the paper pattern. This guide covers how to make a muslin step by step, what to leave out and how to read the fit.
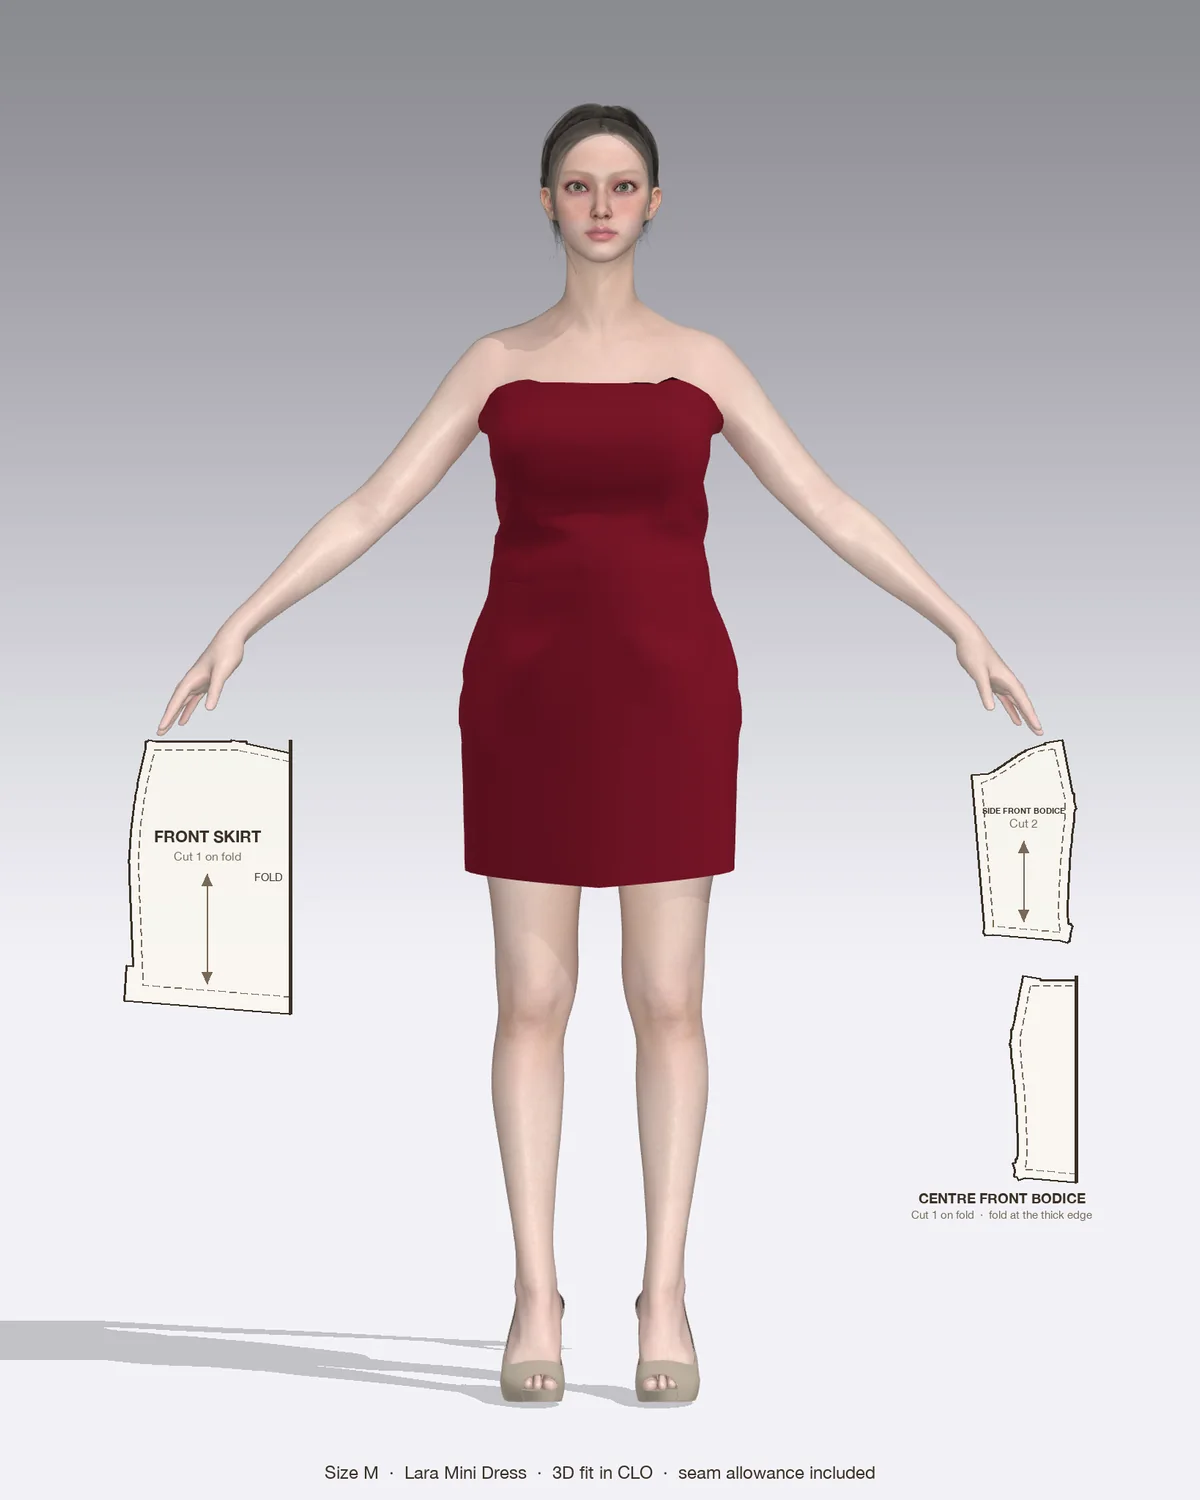
Draped in CLO 3D: the Lara with its pattern pieces, drawn to scale.
In the UK the same thing is called a toile. Either way, an hour or two spent on a muslin is cheaper than a dress you never wear.
When a muslin is worth making
A muslin pays off most on garments that sit close to the body, where a small fit problem shows. Make one for:
Fitted bodices with darts or princess seams, and strapless or corset-style dresses
Fitted pants, where the crotch, seat and waist all have to work together
Set-in sleeves, to check the shoulder width and the armhole
A pattern company you haven’t sewn before, since each drafts for a slightly different body
Expensive or hard-to-replace fabric
You can usually skip it for loose or oversized styles, simple knits, and patterns you have already fitted. If your measurements fall across sizes, grade them on paper first; the guide to grading between sizes shows how, and the muslin then tests that blend.
What you need
Muslin fabric: about the same yardage as the garment’s main pieces, often 1½ to 2½ yd (1.4 to 2.3 m) for a dress bodice and skirt. Use unbleached cotton muslin or calico for crisp wovens such as poplin, linen or sateen. For drapey fashion fabric, use a cheap drapey woven; for knits, a knit with similar stretch. A muslin that is much stiffer or softer than the real fabric gives a misleading fit.
Contrast thread, so the basting is easy to see and remove
A fine marker or pencil, a ruler and, if you have them, tracing paper and a tracing wheel
Pins, a seam ripper and a full-length mirror, plus a phone for photos
Rather than cutting into your printed pattern, trace your size onto pattern paper so the original stays intact for the next size or the next fitting.
How to make a muslin, step by step
Prepare the pattern
Choose your size by the body measurement chart and the finished garment measurements. For tops and dresses, start from the bust or high bust, because shoulders and armholes are the hardest areas to change later.
Make any changes you already know you need on the paper first, such as a length adjustment or a full bust adjustment.
Draw the seamlines on every piece if the pattern shows only cutting lines. Measure in from the cutting line by the pattern’s seam allowance, often ⅝ in (1.5 cm) on home sewing patterns, but check yours.
Cut and mark
Press the muslin fabric flat. It doesn’t need pre-washing unless you plan to wear it.
Cut only the pieces that shape the garment: bodice front and back, skirt or pants pieces, and sleeves if there are any. Skip facings, lining, pockets and waistband extensions for now.
Follow the grainline exactly. A muslin cut off grain twists on the body and hides the real fit.
Transfer the marks to the right side: seamlines, notches, darts, pleats, and the center front and center back lines.
Draw balance lines: a horizontal line at the bust, waist and hip, square to the grainline. On the body these should sit level. Where they tilt or curve, the fit is off.
Baste it together
Set a long stitch, 4 to 5 mm (about 5 to 6 stitches per inch), in contrast thread. It holds for fitting and unpicks easily.
Sew darts and pleats first, then the main seams: shoulders, sides and center back.
Don’t finish the seams. Leave the seam allowances raw and press them the way the finished garment’s seams will lie.
Leave the zipper opening unstitched. Pin it closed along the seamline when you try the muslin on.
Press the neckline, armhole and hem allowances to the wrong side so you can judge where those edges sit.
Sew one sleeve only, if there are sleeves, to check the cap and the arm.
Fitting the muslin
Put on the underwear and shoes you’ll wear with the finished garment, then pin the opening closed on the seamline. A helper makes fitting much easier, but you can fit alone with a mirror and photos taken from the front, side and back.
Start at the top and work down. Shoulders and neckline affect everything below them, so fix them before you look at the waist or hip.
Check the balance lines. The bust, waist and hip lines should be level, and the center front and center back should hang straight.
Read the wrinkles. Drag lines point toward the area that is too tight. Loose folds show extra fabric you can pin out.
Pin out excess by pinching it into a tuck and pinning. Measure the tuck and write the amount on the muslin.
Let out tight areas by unpicking the seam and re-pinning it at a smaller seam allowance. Measure how much room you added.
Move. Sit, bend, reach forward and raise your arms. Pants need sitting and climbing a step; the guide to fixing crotch fit on pants explains what the wrinkles there mean.
Mark the length of the hem and sleeves directly on the muslin.
Write on the muslin as you go: arrows, amounts and new seamlines. These notes are what you’ll transfer back.
If the changes are large, sew a second muslin with them included. Two rounds are common for fitted bodices and pants.
Transfer the changes to the pattern
Unpick the muslin and press the pieces flat.
Lay each muslin piece over its paper piece, matching the grainline, and copy the new seamlines, dart positions and lengths onto the paper.
True the seams. Walk joining seams against each other so the lengths and notches still match, and smooth any angles left by pinned changes.
Update the pieces you didn’t sew: facings, lining and waistbands must follow the new neckline, armhole and waist.
Label the pattern with the date and what you changed, and keep the muslin with it for reference.
Making a muslin for Patterns by Nini patterns
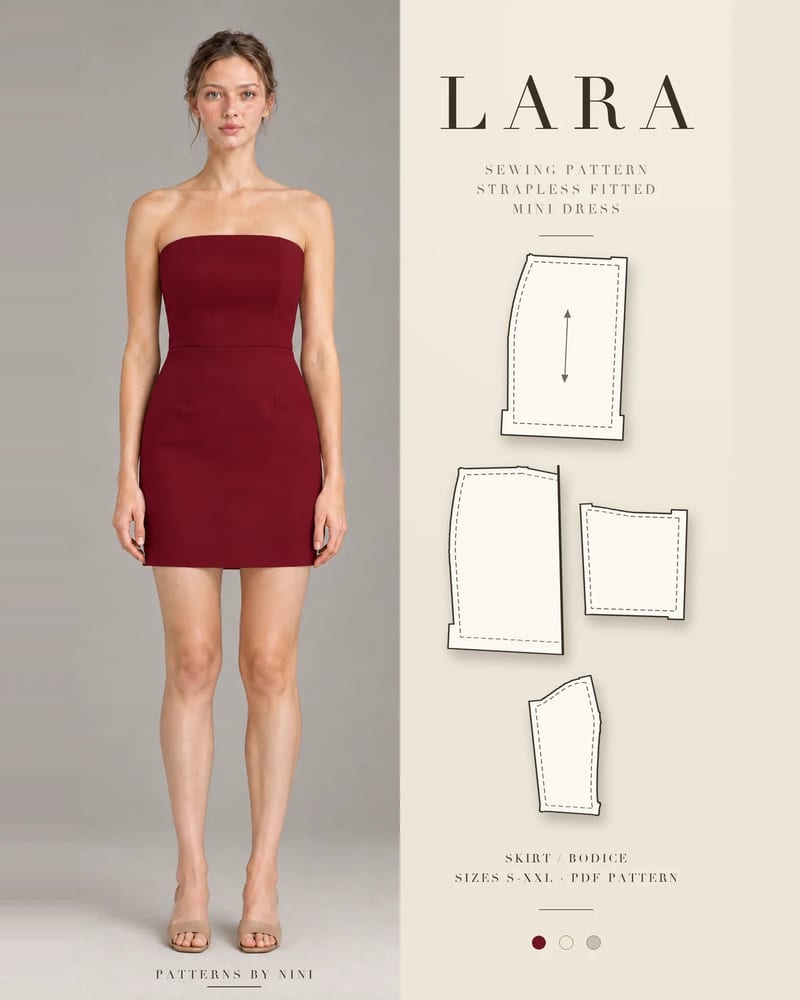
The Lara strapless mini dress is a pattern where a muslin earns its keep. Lara’s fully lined bodice has front princess seams and back waist darts, and a strapless dress has nothing at the shoulders to hold it up, so the fit at the top edge, bust and waist does all the work. Sew the bodice and the darted skirt in muslin, leave the center back seam open where the 16 in (40 cm) invisible zipper goes, and pin it closed on the body. If you plan to use Lara’s optional boning and clear elastic at the top edge, add them to the muslin too, because they change how the top edge sits. Check that the top edge lies flat against your body without gaping or cutting in when you breathe, sit and raise your arms.
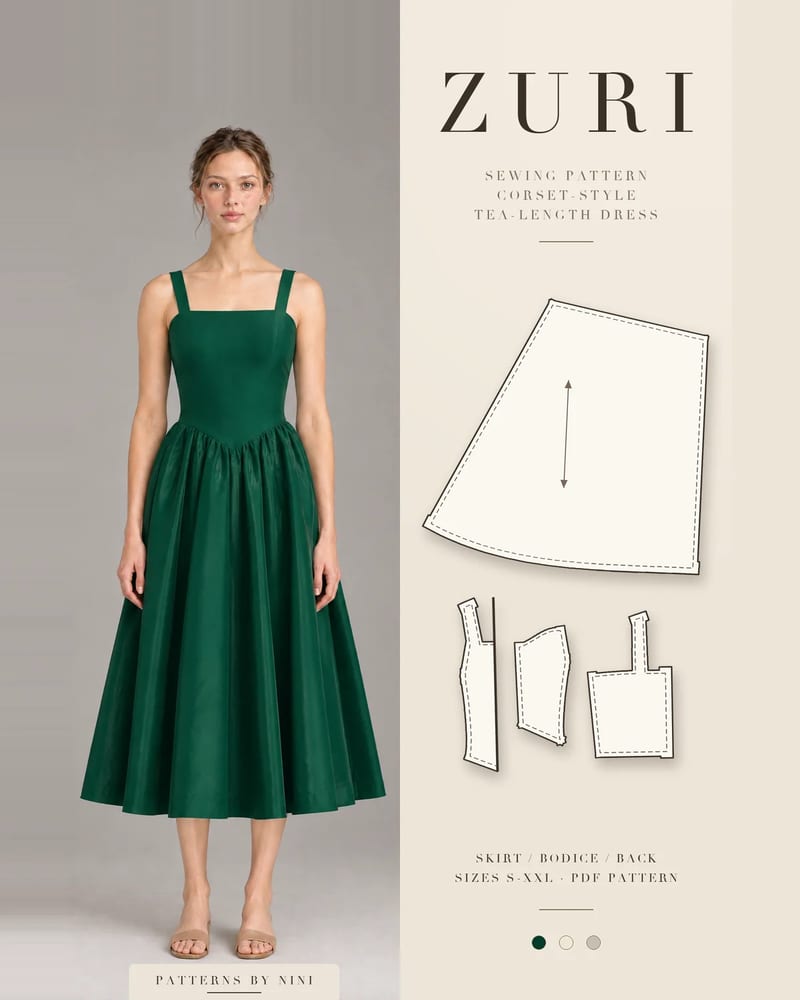
The same approach works for the Zuri corset-style dress, with its lined princess-seam bodice and pointed Basque waist: sew the bodice only, since the gathered skirt rarely needs fitting. For fitted pants such as the Tolu pleated pants, a muslin cut to the hip or knee is enough to check the waistband, pleats, back darts and crotch. Every Patterns by Nini PDF includes a size chart and finished measurements in inches and centimeters, so you can compare them with your own before you cut the muslin.
Common muslin mistakes
Mistake
What goes wrong
Fix
Muslin fabric much stiffer than the real fabric
Fits tighter and stands away from the body
Match the weight and drape of your fashion fabric
No balance lines drawn
Hard to see where the fit is off
Mark bust, waist and hip lines before sewing
Cut off grain
Seams twist and the hem swings
Follow the grainline on every piece
Fitting in the wrong underwear
Bust and waist sit in the wrong place
Wear what you’ll wear with the garment
Changes made only on the muslin
The paper pattern stays wrong
Transfer every change, then true the seams
Facings and lining left at the old size
They no longer match the new edges
Redraw them from the corrected pieces
Fixing the hip before the shoulders
Upper changes shift everything below
Fit from the top down
Quick checklist
Size chosen and known changes made on a traced copy
Shaping pieces cut on grain, with seamlines, notches and balance lines marked
Basted with a 4 to 5 mm stitch, seams pressed, opening pinned closed
Fitted from the top down, wearing the right underwear, while moving
Changes measured, written on the muslin and transferred to the paper
Seams trued and facings, lining and waistbands updated
Frequently asked questions
What is the difference between a muslin and a toile?
Nothing, apart from the word. Muslin is the usual US term, named after the inexpensive unbleached cotton that test garments are often sewn from. Toile is the British and French term for the same thing. Both mean a quick practice version of a pattern, sewn in cheap fabric to check fit and style before you cut your good fabric.
What fabric should I use for a muslin?
Use an inexpensive woven that behaves like your final fabric. Cotton muslin or calico suits crisp wovens such as poplin, linen and sateen. For drapey fabrics like rayon or crepe, use a cheap drapey woven, and for knits use a knit with similar stretch. Old bed sheets and large remnants work too. Choose a light, plain color so your marks show.
Do I need to make a muslin for every pattern?
No. Loose, oversized styles, simple knits and patterns you have already fitted rarely need one. A muslin pays off on fitted garments with darts or princess seams, strapless or corset-style bodices, fitted pants, set-in sleeves, a new-to-you pattern company, or any project where the fashion fabric is expensive or hard to replace.
Should a muslin include facings, lining and a zipper?
Usually not. Facings and linings don't change the fit, so skip them and press the neckline and armhole seam allowances to the inside instead. Leave the zipper opening unstitched and pin it closed when you try the muslin on, or baste in a cheap zipper if you fit alone. Include anything that shapes the body, such as darts, pleats and boning.
What is a wearable muslin?
A wearable muslin is a test version sewn in a fabric you would actually wear, with finished seams, so that if the fit works you get a real garment. It suits patterns that probably need only small changes. Choose a fabric similar to your final one but less precious, and still baste the main fitting seams first.
Plus size sewing patterns explained: what the size ranges mean, how to pick your size from your measurements, the fit changes to expect and the easiest styles.
How to choose a sewing pattern size: measure your bust, waist and hip, read the body chart, check finished measurements for ease and pick a starting size.
Help us understand what inspires you
May we use Pinterest cookies to measure visits and purchases and improve our advertising? You can shop either way and change your choice in Cookie settings. Privacy policy
 Patterns