A note on measurements: this guide is written for US sewists, so it uses US units first: inches, yards
and US paper sizes (Letter, 36 × 48 in). Metric equivalents are in brackets where they matter. If you're not used to US
measurements, convert them before you cut: 1 in = 2.54 cm, 1 yd = 91.4 cm.
To sew pants, you cut a front and back for each leg, sew the pockets onto the fronts, join each leg at the inseam and side seam, then slip one leg inside the other and sew the crotch curve. The waistband and hem come last. This guide shows how to sew pants from a pattern step by step, using pull-on wide-leg pants with an elastic waist and slanted pockets as the example, because they teach the core of every pair of pants without a zipper or fly.
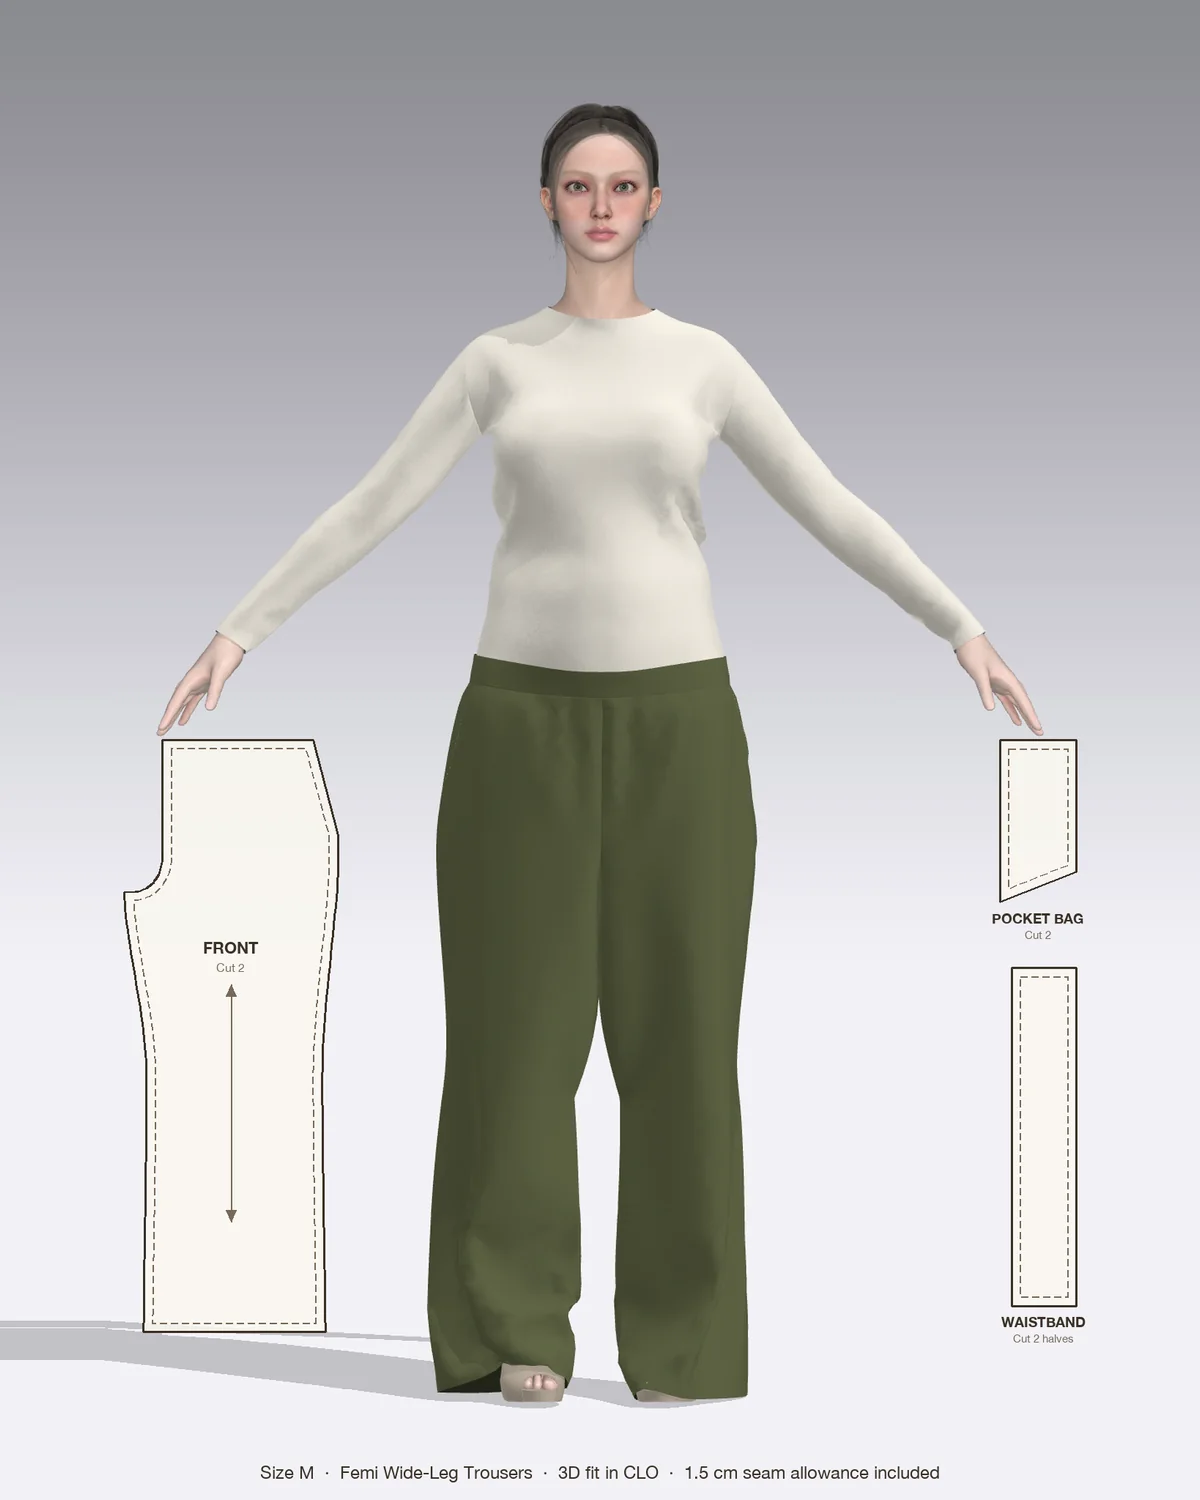
Draped in CLO 3D: the Femi with its pattern pieces, drawn to scale.
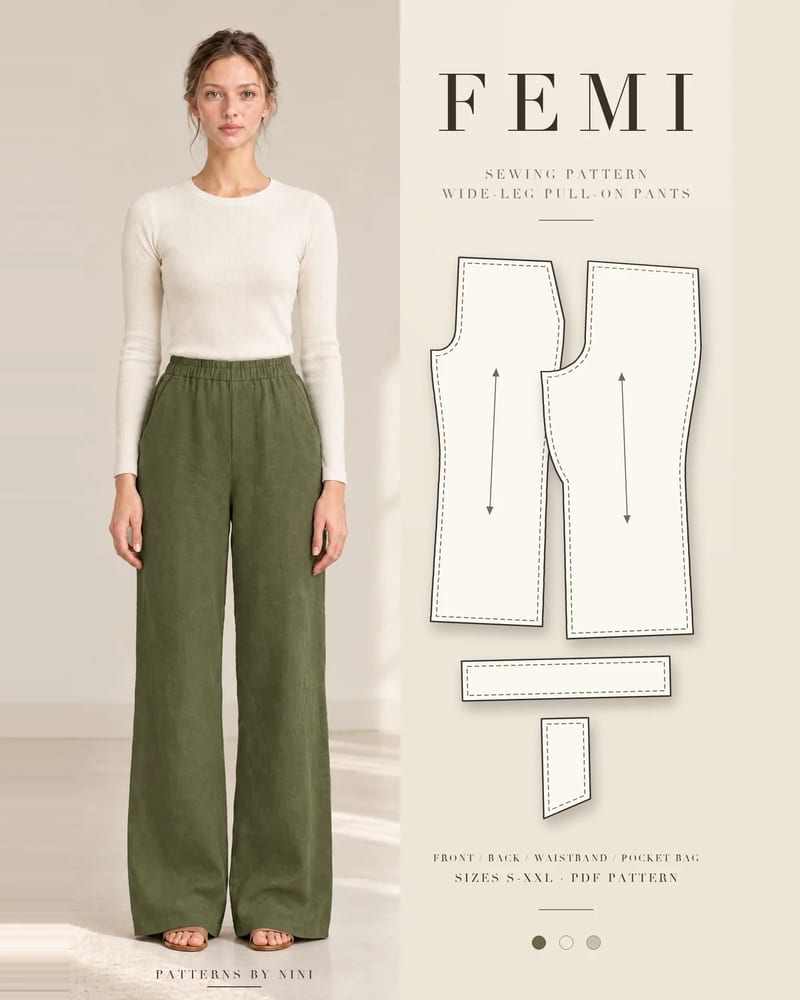
The example follows the construction of pants like the Femi wide-leg pants: a gathered elastic waistband, slanted front pockets with a side-front yoke, and straight wide legs with no zipper, fly or darts. If your pattern gives a different order, follow its instructions.
What you need before you start
A pattern. For your first pair, choose pull-on pants marked beginner. The guide to sewing patterns for beginners covers what to look for.
Fabric. A medium-weight woven with soft drape: linen, linen-viscose, cotton twill or Tencel. Femi calls for 2 5/8 yd (2.4 m) of 55 to 60 in (140 to 150 cm) wide fabric in sizes S and M, and 3 yd (2.7 m) in L to XXL.
Elastic. Use the width your pattern names, since the waistband is drafted for it. Femi uses 1 1/4 in (30 mm) elastic.
Pocket lining (optional), matching thread, pins or clips, chalk, a tape measure, sharp scissors, a seam ripper and an iron.
Choose your size and cut
Measure your waist and hips in your underwear, with the tape level. For pull-on pants, the hip measurement matters most, because the pants must slide over your hips.
Pick your size from the body measurement chart, not the finished garment chart. If your waist and hips fall in different sizes, choose by your hips: the elastic takes care of the waist.
Check the length. Compare the pattern’s inseam with your own, and lengthen or shorten at the line on the pattern piece, not at the hem, so the leg shape stays the same.
Prewash the fabric the way you’ll wash the finished pants, then press it.
Cut with every grainline parallel to the selvage. Off-grain legs twist around your body after the first wash.
Mark the notches. On most patterns, single notches mark the front and double notches mark the back. Chalk “F” and “B” on the wrong side of each piece too. Front and back legs look alike, but the back crotch curve is longer and deeper.
How to sew pants step by step
Sew with a straight stitch of 2.5 mm at the seam allowance your pattern gives, often 3/8 in (1 cm) or 5/8 in (1.5 cm). Press every seam before you cross it with another one.
1. Sew the slanted pockets
Pin the pocket lining (or facing) to the slanted edge of each front, right sides together, and stitch.
Trim the seam allowance to about 1/4 in (6 mm), then understitch the lining 1/8 in (3 mm) from the seam so it stays hidden inside.
Turn the lining to the inside and press the slanted edge. Topstitch it if your pattern shows topstitching.
Lay the side-front yoke (the pocket piece that forms the back of the pocket) behind the lining, matching the notches, and sew the two pocket bag pieces together around the curved bottom edge.
Baste the pocket to the front at the waist and side edges, about 1/4 in (6 mm) from the raw edge, so it acts as one layer from here on.
2. Sew the leg seams
Pin one front to one back, right sides together, along the inseam and the side seam. Match the notches and the hem edges.
Stitch both seams, backstitching at each end. Leave the crotch curve open.
Finish the seam allowances with a zigzag or serger and press them open or toward the back.
Repeat for the second leg. You now have two separate tubes.
3. Sew the crotch seam
Turn one leg right side out and the other wrong side out.
Slip the right-side-out leg inside the other leg, so the two are right sides together and the crotch curves line up.
Pin at the inseams first, matching the seam lines exactly, then at the center front, center back and notches.
Stitch the whole curve in one pass, from the top of the center front to the top of the center back.
Stitch a second row over the lower curve, between the notches, or just inside the first row. This is the seam that takes the most strain when you sit down.
Trim the lower curve to about 1/4 in (6 mm) and finish it with a zigzag. Leave the upper front and back allowances full width.
Try the pants on now. If they pull or sag at the crotch, the guide on how to fix crotch fit on pants explains which adjustment you need.
4. Make and attach the elastic waistband
Sew the short ends of the waistband into a loop, right sides together, and press the seam open.
Fold the band in half lengthwise, wrong sides together, and press.
Pin the band to the top of the pants, raw edges together, matching the band seam to the center back. Spread the pants evenly around the band.
Stitch all around, leaving a 2 in (5 cm) gap near the center back to feed the elastic through.
Cut the elastic to the length your pattern gives for your size, or wrap it snugly around your waist and add 1 in (2.5 cm) for overlap. Feed it through the gap with a safety pin.
Overlap the elastic ends by 1 in (2.5 cm) and zigzag them together with a few passes. Check the elastic hasn’t twisted.
Stitch the gap closed, then finish the seam allowance. Spread the gathers evenly and stitch in the ditch through the band at each side seam so the elastic can’t twist or roll in the wash.
5. Hem the legs
Try the pants on with the shoes you’ll wear them with and mark the length. Femi’s hem is drafted to just cover the top of the foot. Press up a double-fold hem, such as 1/2 in (1.3 cm) then 1 in (2.5 cm), and stitch it close to the inner fold by machine or with a blind hem by hand. The guide on how to hem pants covers both methods. Give the pants a final press.
Common mistakes and how to fix them
Mistake
What happens
Fix
Mixing up front and back
The pants feel tight at the seat and baggy at the front
Check single and double notches before sewing
Sewing two left legs
Pockets end up on the same side
Lay the legs out as a pair before stitching
Inseams not matched at the crotch
A lump or step where the seams cross
Pin the inseams first, seam on seam
One row of crotch stitching
The seam splits when you sit or bend
Add a second row over the lower curve
Elastic cut from a waist guess
A waistband that slides down or digs in
Use the pattern’s elastic length, then try it on before closing
Hemming before trying on
Legs end up too short or uneven
Mark the length while wearing the shoes you’ll pair them with
Pants to sew next
The Femi wide-leg pants follow every step above, from the slanted pockets to the gathered elastic waistband, in sizes S to XXL. The Yinka palazzo pants use the same pocket and waistband method with fuller, floor-length legs, and the Ola pajama pants are simpler still, with no pockets.
When you’re ready for a zipper, the Tolu pleated pants add front pleats, back darts, an interfaced flat waistband and an invisible zipper at the center back. The Tayo flare pants put the zipper in the left side seam. The guide to sewing an invisible zipper walks through that step.
Frequently asked questions
Are pants hard to sew for a beginner?
Pull-on pants with an elastic waist are one of the easier garments to sew, because there is no zipper, fly or buttonhole and the fit is forgiving. The only new skill is the crotch seam, which is just a curved seam sewn twice for strength. Leave fitted pants with a fly front or welt pockets until you've made a pair or two.
Which seam do you sew first on pants?
Most patterns sew each leg first, joining the inseam and side seam, then turn one leg inside the other and sew the crotch in one curve. Some sew the front and back crotch seams first and then the inseam in one long line from hem to hem. Both work. Follow your pattern's order, because pocket and zipper steps are planned around it.
How much fabric do I need to make pants?
It depends on the leg width, length and your size, so use the fabric chart on your pattern. Wide-leg pants take more than slim ones. The Femi wide-leg pants, for example, need 2 5/8 yd (2.4 m) of 55 to 60 in (140 to 150 cm) wide fabric in sizes S and M, and 3 yd (2.7 m) in sizes L to XXL.
What is the best fabric for sewing your first pants?
A medium-weight woven with a little drape, such as linen, linen-viscose, cotton twill or Tencel. It presses well, doesn't slip under the presser foot and hangs nicely on a wide leg. Avoid very thin or slippery fabrics, which are hard to cut and sew accurately, and stretch knits, which need different stitches and a pattern drafted for stretch.
How to sew a French seam: stitch wrong sides together, trim, fold and stitch again to enclose the raw edges. Measurements for every common seam allowance.
A seam gauge for sewing is a 6 in ruler with a sliding marker. Learn to use it for even hems, seam allowances, buttonholes, pleats, darts and elastic casings.
Help us understand what inspires you
May we use Pinterest cookies to measure visits and purchases and improve our advertising? You can shop either way and change your choice in Cookie settings. Privacy policy
 Patterns