A note on measurements: this guide is written for US sewists, so it uses US units first: inches, yards
and US paper sizes (Letter, 36 × 48 in). Metric equivalents are in brackets where they matter. If you're not used to US
measurements, convert them before you cut: 1 in = 2.54 cm, 1 yd = 91.4 cm.
To sew bell bottom pants, use a pattern that is fitted through the hip and thigh and flares from the knee, or add flare to a pants pattern you already own, then sew them like any other pants and finish with a shallow hem that suits the wide leg. This guide covers how to sew bell bottom pants from start to finish, with the measurements for drafting the flare, fitting and hemming.
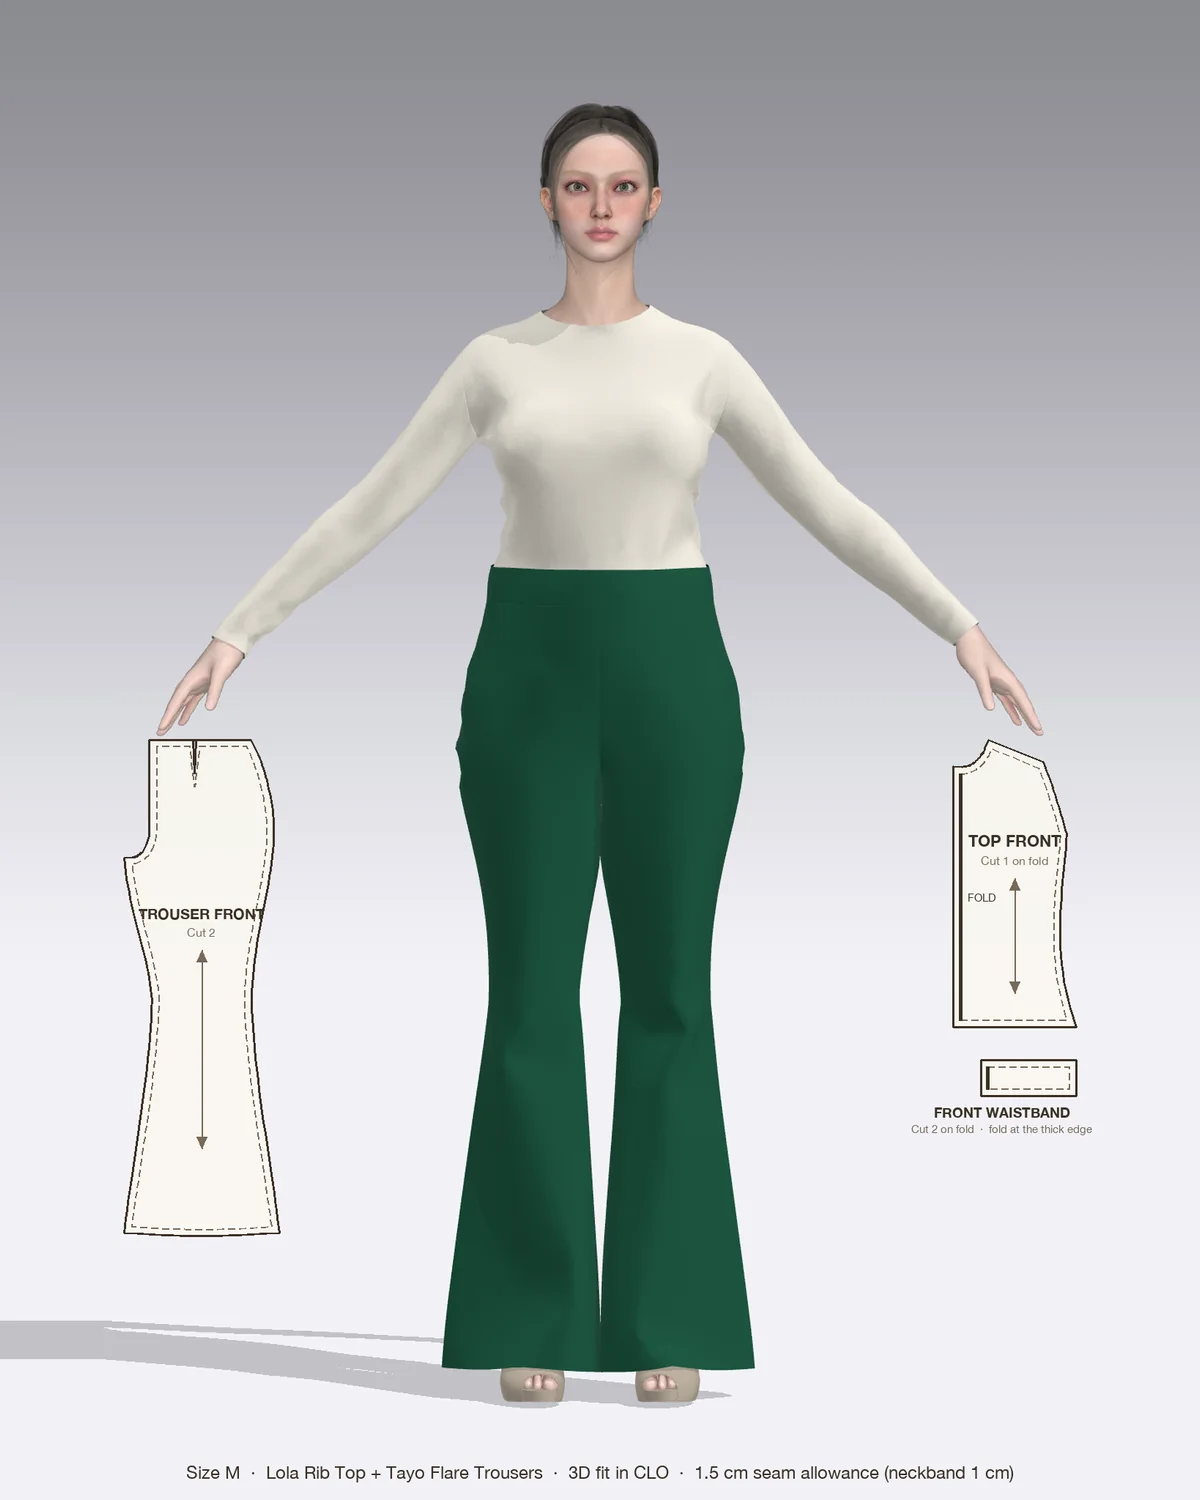
Draped in CLO 3D: the Tayo with its pattern pieces, drawn to scale.
Bell bottoms, flares and bootcut pants are the same shape at different strengths. All three are close-fitting above the knee and widen below it. Bootcut opens a little, flares widen steadily, and bell bottoms kick out the most.
What you need
A pattern with a fitted hip and a flare from the knee, such as the Tayo flare pants, or a straight or slim pants pattern you plan to hack.
Fabric with body and a little stretch: stretch suiting, crepe, stretch twill or denim with 2 to 5 percent elastane. Tayo is drafted for exactly this kind of woven. The flare takes more fabric than a straight leg, so buy for the widest point of the leg, not the hip.
Notions your pattern lists, typically a zipper, interfacing for the waistband and matching thread. Tayo uses an 8 in (20 cm) invisible zipper, lightweight fusible interfacing and an invisible zipper foot.
Pattern paper, a long ruler and a hip curve if you are adding flare yourself.
How to add flare to a pants pattern
Skip this if your pattern is already a flare. Otherwise, start from a slim or straight leg that fits you well through the hip and thigh, because the flare changes only the lower leg.
Mark the knee. Find the knee line on the pattern, or hold the front piece against your leg and mark the middle of your kneecap. Flares usually start at the knee or 1 to 2 in (2.5 to 5 cm) above it.
Decide the hem width. Measure around the hem of a pair of flares you like, or start with a total hem circumference of about 24 to 28 in (61 to 71 cm) for a full bell. Subtract the pattern’s current hem width to find how much to add.
Split the extra width four ways. Divide the amount between the inseam and side seam of both the front and back pieces, so each of the four seams gets a quarter. Adding to only one seam twists the leg. Threads magazine’s advice on changing leg width works the same way, sharing the change between the side seams and inseams of both the front and back.
Redraw the seams. At the hem, mark the new width out from each seam line. Join it to the knee mark with a long, gentle curve, not a sharp angle, so the seam doesn’t pucker at the knee.
True the hem. Fold up the hem allowance on the paper and trim along the side seams so the turned-up edge matches the leg. Then square the hem off at each seam, so the front and back meet in a smooth line rather than a point.
Add length if needed. Bell bottoms are usually worn long, to the floor with the shoes you plan to wear. Lengthen at the lengthen/shorten line, not at the hem, so the flare starts in the same place.
Seamwork advises making a muslin after any change like this, in a fabric with similar stretch, to check the knee sits in the right place. The guide on how to make a muslin explains the process.
How to sew bell bottom pants step by step
Sew with a 2.5 to 3 mm straight stitch at the seam allowance your pattern gives. On fabric with elastane, a slightly longer stitch and a new universal or microtex needle stop skipped stitches. Press with a medium iron and a press cloth, because many stretch suitings contain polyester that shines under a hot iron.
1. Prepare the pieces
Prewash the fabric the way you’ll wash the pants.
Cut with every grainline parallel to the selvage. A long flared leg cut off-grain twists badly below the knee.
Transfer the knee notches. They are the most important matching points on a flare.
Fuse interfacing to the waistband and to the zipper seam allowance if your pattern calls for it.
2. Sew the darts and zipper
Sew the front and back waist darts and press them toward the center. The guide on how to sew darts covers the steps.
On Tayo, the invisible zipper goes into the left side seam. Insert it before you sew the rest of that seam, then close the seam below it.
3. Sew the leg seams
Pin front to back at the side seam and inseam, matching the knee notches first, then the hip and hem.
Sew from the top down to the hem. Sewing every seam in the same direction stops the flare from drifting.
Finish the seam allowances with a zigzag or serger and press them open. Pressing open keeps the flare symmetrical.
Try the pants on. Check that the side seams hang straight down the side of the leg and that the flare starts at the same height on both legs.
4. Sew the crotch and waistband
Turn one leg right side out, slip it inside the other and sew the crotch curve in one pass, then reinforce the lower curve with a second row of stitching.
Attach the waistband, understitch or topstitch it, and finish the ends at the zipper.
If the crotch pulls or wrinkles at the fitting stage, the guide on how to fix crotch fit on pants shows which adjustment you need.
How to hem bell bottom pants
The hem is where bell bottoms are most different from straight pants. The flare means the hem allowance, when turned up, is narrower than the leg it is sewn to, so a deep hem pulls and ripples.
Mark the length in your shoes. Tayo is drafted to be floor length with 2 to 3 in (5 to 8 cm) heels, so mark it wearing heels of that height. Ask someone to pin the hem level with the floor all the way around, or use a hem marker.
Keep it shallow. NMSU Extension recommends hems of 1/2 to 1 in (1.3 to 2.5 cm) on flared or circular edges, compared with 1 to 2 in (2.5 to 5 cm) on regular pants. On bell bottoms, 1 to 1 1/4 in (2.5 to 3 cm) is a good maximum.
Ease the edge if needed. Sew a long stitch 1/4 in (6 mm) from the raw edge and pull the bobbin thread gently until the turned-up edge lies flat against the leg. Steam out the fullness on wool blends.
Or use a facing. For a very full bell, cut a shaped facing from the bottom 2 in (5 cm) of the leg pattern, or use a 1 in (2.5 cm) bias strip, sew it to the hem edge and turn it up. A facing follows the curve exactly.
Stitch. Use a blind hem stitch or a narrow zigzag on stretch fabric so the hem can give as you walk.
The guide on how to hem pants covers blind hemming by hand and by machine in more detail.
Common mistakes and how to fix them
The flare twists toward the front. Extra width was added to one seam only, or the legs were cut off-grain. Split the width evenly across all four seams and recut along the grain.
The pants look like wide-leg pants. The flare starts too high. Move it down to the knee and keep the thigh fitted.
A visible point at the knee. The new seam line meets the old one at an angle. Redraw it as one smooth curve from above the knee to the hem.
The hem ripples. The allowance is too deep for the flare. Cut it down to 1 in (2.5 cm), ease it, or face it instead.
The hem drags or is too short in one spot. The length was marked without shoes or on a slope. Re-mark it standing on a hard floor in the shoes you’ll wear.
The flare collapses. The fabric is too soft. Choose a woven with more body, or add a hem facing to give the hem weight.
Sew bell bottoms with Tayo and Bimpe
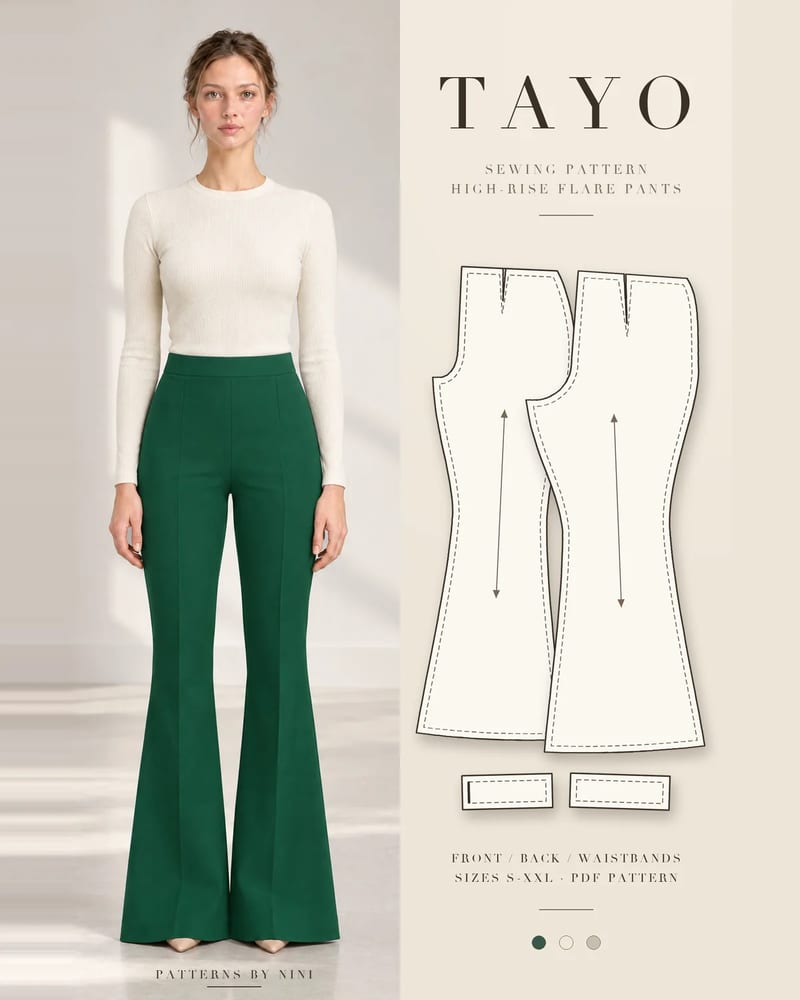
The Tayo high-rise fitted flare pants are already drafted as a flare, so you can skip the pattern hack. They are fitted through the hip, flared from the knee and floor length with heels, with a high-rise interfaced flat waistband, front and back waist darts and an invisible zipper in the left side seam. They come in sizes S to XXL and are made in stretch suiting, crepe or ponte-weight wovens with 2 to 5 percent elastane. The invisible zipper guide covers the side-seam zipper step by step.
For a pull-on version in knit, the Bimpe flare leggings flare from just above the knee to the floor, with a wide elastic waistband and no zipper or pockets. Tayo is designed to pair with the Lola rib top. If you are new to pants, the how to sew pants guide walks through a simpler pull-on pair first.
Frequently asked questions
What is the difference between bell bottoms, flares and bootcut pants?
All three widen below the knee. Bootcut pants open only slightly, just enough to fit over a boot. Flares widen steadily from the knee to the hem. Bell bottoms are the most dramatic version, fitted through the hip and thigh and kicking out widely below the knee, so the hem is much wider than the knee. The sewing steps are the same for all three.
Where should the flare start on bell bottom pants?
Usually at the knee or just above it. Starting the flare there keeps the thigh fitted, which is what makes the leg look long. If the flare starts too high the pants read as wide-leg; too low and they look like bootcut. Mark your knee on the pattern while holding it against your leg, and start the new line from that point.
What fabric is best for bell bottom pants?
A woven with some body and a little stretch, such as stretch suiting, crepe, stretch twill or denim with 2 to 5 percent elastane. The stretch lets the hip and thigh fit closely, and the body holds the flare out. Very soft, drapey fabrics collapse at the hem, and stiff fabrics without stretch need extra ease through the hip to sit down comfortably.
Can I turn straight leg pants into bell bottoms?
Yes. Unpick the side seams or inseams from the hem to the knee and sew in a triangle of fabric, called a godet, on each side. A wider base gives more flare. On a pattern, it is easier: add width to the hem on both the inseam and side seam of the front and back pieces, then redraw the lines up to the knee.
What is interfacing in sewing? The hidden layer that firms facings, collars and zipper openings. Learn the types, how to pick a weight and how to fuse it well.
How to finish seams without a serger: zigzag, overcast, pinked, turned and stitched, French, flat-felled, bound and hand overcast, with settings for each.
Help us understand what inspires you
May we use Pinterest cookies to measure visits and purchases and improve our advertising? You can shop either way and change your choice in Cookie settings. Privacy policy
 Patterns